Integrating Arcadia Lumenize ProT5 Lamps with ESPHome and Home Assistant

Introduction
Arcadia Lumenize ProT5 lamps are highly regarded in the reptile hobby for their superior UVB lighting and advanced features. These lamps communicate over Bluetooth Low Energy (BLE) and come with a convenient phone app for control and scheduling. Despite the advanced scheduling capabilities of the app, some hobbyists prefer to manage all their smart devices from a single platform like Home Assistant. This article will guide you through integrating Arcadia Lumenize ProT5 lamps with ESPHome using an ESP32 microcontroller.
Arcadia Lumenize ProT5 Lamps
Arcadia Lumenize ProT5 lamps provide optimal lighting conditions for reptiles, promoting their health and well-being. The lamps use BLE to communicate and come with a phone app that allows for easy control and scheduling.
Why Integrate with ESPHome?
Although the Arcadia Lumenize ProT5 lamps have an advanced scheduling system, integrating them with ESPHome allows for centralized control over all your automations. This integration simplifies the management and customization of your setup, making it easier to control your lamps along with other smart devices from a single platform like Home Assistant.
Prerequisites
Before you start, you should have a basic understanding of ESPHome. You can find more information here or watch some helpful video tutorials.
To fully utilize this guide, you will need:
- Home Assistant or a similar automation platform
- Basic understanding of ESPHome
Using ESP32 as a Hub
The ESP32 chip is a versatile and cost-effective microcontroller, supporting both BLE and WiFi. These controllers are readily available from various online and local electronics stores, often costing less than $10/€10. This affordability makes the ESP32 an ideal hub to connect your Arcadia Lumenize ProT5 lamps to the internet. With a simple setup, you can bridge the lamps with ESPHome, allowing for greater control and automation.
Required Hardware
To get started, you will need:
- NodeMCU-32 or Wemos D1 mini ESP32
- USB cable
- Computer
No Soldering Needed
This setup does not require any soldering. Simply connect the ESP32 to your computer via USB and upload the necessary software.
Once the ESP32 chip has been programmed, it can be powered using a standard phone charger, adding to its convenience and ease of use.
ESPHome Overview
ESPHome allows you to control your ESP32 (and other ESP chips) using simple configuration files. It integrates seamlessly with Home Assistant and provides an API that can connect to other systems as well. For more information, refer to the ESPHome documentation.
ESPHome Configuration
Below is the ESPHome configuration to upload to your ESP32. This configuration sets up the ESP32 to connect to your Arcadia Lumenize ProT5 lamps and integrate them with Home Assistant or any other system using the ESPHome API.
Configuration Details
Note: The 'Basic ESP32 configuration' and 'Basic network configuration' sections are examples. When setting up a new device through ESPHome, the configuration will be set automatically. Let ESPHome handle your exact device type, keys, and passwords, and only copy everything below '# START TO COPY FROM HERE'.
To integrate your Arcadia Lumenize ProT5 lamps with ESPHome, you will need to obtain the MAC addresses of your lamps. The MAC address is a unique identifier for each device and is required for the ESP32 to communicate with the lamps.
Finding the MAC Address:
- Open the Lumenize app on your phone.
- The lamps should be automatically discovered.
- The MAC address should be clearly displayed, in a format like 00:00:00:00:00:00.
Once you have the MAC addresses, replace the placeholder MAC addresses in the configuration with the ones you obtained from the app.
Example configuration
In the example configuration below, two lamps are configured by replicating the configuration and numbering each entity. This setup can be adjusted to accommodate a total of one to three devices.
# Basic ESP32 configuration
esphome:
name: lumenize-hub
friendly_name: lumenize-hub
esp32:
board: esp32dev
framework:
type: arduino
logger:
# Basic network configuration
web_server:
port: 80
api:
encryption:
key: "__your_encryption_key_here__"
ota:
password: "__your_ota_password_here__"
wifi:
ssid: !secret wifi_ssid
password: !secret wifi_password
ap:
ssid: "Lumenize-Hub Fallback Hotspot"
password: "__your_fallback_password_here__"
captive_portal:
# START TO COPY FROM HERE
# Lumenize ProT5 example for 2 lamps
globals:
- id: light_brightness_1
type: int
restore_value: no
initial_value: '0'
- id: ble_connected_1
type: bool
restore_value: no
initial_value: 'false'
- id: light_brightness_2
type: int
restore_value: no
initial_value: '0'
- id: ble_connected_2
type: bool
restore_value: no
initial_value: 'false'
esp32_ble_tracker:
ble_client:
- mac_address: 00:00:00:00:00:00 # Put the MAC address of the 1st lamp here
id: arcadia_t5_1
on_connect:
then:
- delay: 1s
- ble_client.ble_write:
id: arcadia_t5_1
service_uuid: 0000fff0
characteristic_uuid: 0000fff2
value: [0x05, 0xf0, 0x00, 0x01, 0x02, 0x03, 0x04, 0x00, 0x00, 0x00, 0x00, 0x00, 0x00, 0x00, 0x00, 0x50]
- ble_client.ble_write:
id: arcadia_t5_1
service_uuid: 0000fff0
characteristic_uuid: 0000fff2
value: !lambda |-
return {0x02, 0xf1, 0x00, (unsigned char)(id(light_brightness_1)), 0x02, 0x00, 0x00, 0x00, 0x00, 0x00, 0x00, 0x00, 0x00, 0x00, 0x00, 0x20};
- globals.set:
id: ble_connected_1
value: 'true'
- binary_sensor.template.publish:
id: ble_connected_sensor_1
state: ON
on_disconnect:
then:
- globals.set:
id: ble_connected_1
value: 'false'
- binary_sensor.template.publish:
id: ble_connected_sensor_1
state: OFF
- mac_address: 00:00:00:00:00:00 # Put the MAC address of 2nd first lamp here
id: arcadia_t5_2
on_connect:
then:
- delay: 1s
- ble_client.ble_write:
id: arcadia_t5_2
service_uuid: 0000fff0
characteristic_uuid: 0000fff2
value: [0x05, 0xf0, 0x00, 0x01, 0x02, 0x03, 0x04, 0x00, 0x00, 0x00, 0x00, 0x00, 0x00, 0x00, 0x00, 0x50]
- ble_client.ble_write:
id: arcadia_t5_2
service_uuid: 0000fff0
characteristic_uuid: 0000fff2
value: !lambda |-
return {0x02, 0xf1, 0x00, (unsigned char)(id(light_brightness_2)), 0x02, 0x00, 0x00, 0x00, 0x00, 0x00, 0x00, 0x00, 0x00, 0x00, 0x00, 0x20};
- globals.set:
id: ble_connected_2
value: 'true'
- binary_sensor.template.publish:
id: ble_connected_sensor_2
state: ON
on_disconnect:
then:
- globals.set:
id: ble_connected_2
value: 'false'
- binary_sensor.template.publish:
id: ble_connected_sensor_2
state: OFF
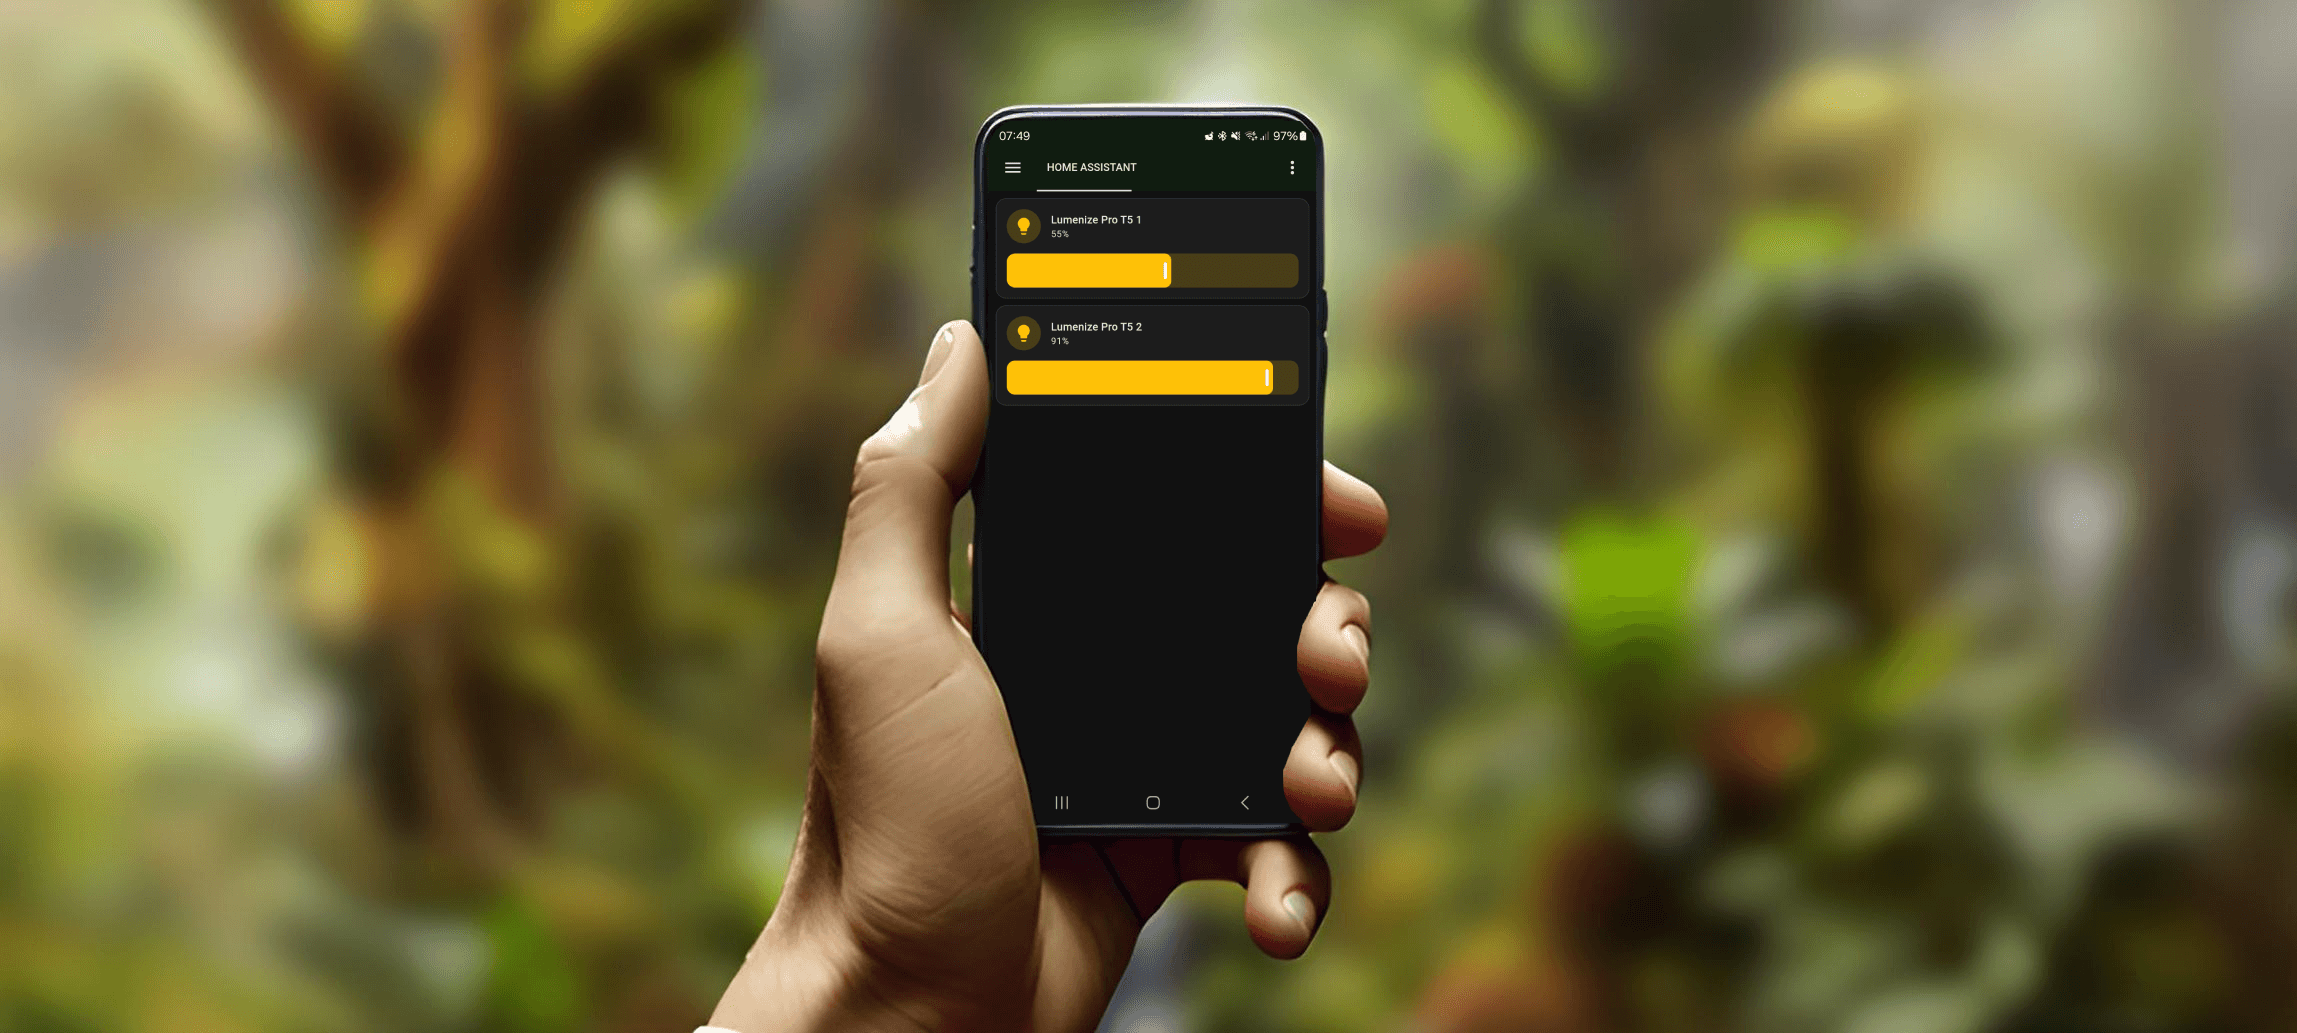
light:
- platform: monochromatic
id: arcadia_t5_light_1
name: "Lumenize Pro T5 1" # The name of the 1st lamp can be changed here
output: brightness_output_1
gamma_correct: 0
default_transition_length: 0s
restore_mode: RESTORE_DEFAULT_ON
- platform: monochromatic
id: arcadia_t5_light_2
name: "Lumenize Pro T5 2" # The name of the 2nd lamp can be changed here
output: brightness_output_2
gamma_correct: 0
default_transition_length: 0s
restore_mode: RESTORE_DEFAULT_ON
output:
- platform: template
id: brightness_output_1
inverted: false
min_power: 0
max_power: 1
type: float
zero_means_zero: true
write_action:
- ble_client.ble_write:
id: arcadia_t5_1
service_uuid: 0000fff0
characteristic_uuid: 0000fff2
value: !lambda |-
id(light_brightness_1) = static_cast<int>(state * 100);
return {0x02, 0xf1, 0x00, (unsigned char)(id(light_brightness_1)), 0x02, 0x00, 0x00, 0x00, 0x00, 0x00, 0x00, 0x00, 0x00, 0x00, 0x00, 0x20};
- platform: template
id: brightness_output_2
inverted: false
min_power: 0
max_power: 1
type: float
zero_means_zero: true
write_action:
- ble_client.ble_write:
id: arcadia_t5_2
service_uuid: 0000fff0
characteristic_uuid: 0000fff2
value: !lambda |-
id(light_brightness_2) = static_cast<int>(state * 100);
return {0x02, 0xf1, 0x00, (unsigned char)(id(light_brightness_2)), 0x02, 0x00, 0x00, 0x00, 0x00, 0x00, 0x00, 0x00, 0x00, 0x00, 0x00, 0x20};
binary_sensor:
- platform: template
name: "Lumenize Pro T5 1 BLE connected" # The name of the 1st lamp's BLE connected sensor can be changed here
id: ble_connected_sensor_1
lambda: |-
return id(ble_connected_1);
- platform: template
name: "Lumenize Pro T5 2 BLE connected" # The name of the 2nd lamp's BLE connected sensor can be changed here
id: ble_connected_sensor_2
lambda: |-
return id(ble_connected_2);
Important Notes
- Disable Automatic Schedules: Ensure you disable the automatic schedules on your lamps through the Lumenize app before proceeding. This will prevent conflicts between the app and the ESP32.
- BLE Connection: The ESP32 will maintain a BLE connection to the lamps, which means the app will no longer be able to connect to the lamps directly.
- State Persistence: The ESP32 will keep the state of the lamps across reboots and connection drops, ensuring your settings are maintained.
- Multiple Lamps: You can connect up to three lamps to a single ESP32. According to ESPHome documentation, maintaining a BLE connection uses significant RAM on the chip, so three is the maximum recommended number.
Conclusion
Integrating your Arcadia Lumenize ProT5 lamps with ESPHome using an ESP32 microcontroller can significantly enhance your automation setup. With this integration, you can have centralized control over your reptile lighting, making it easier to manage and customize your environment. Whether you use Home Assistant or another system that supports the ESPHome API, this setup will provide you with robust control and automation capabilities. Follow the steps outlined in this article, and you'll have your lamps connected and automated in no time.